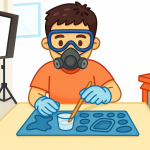
To create realistic sea foam effects in epoxy resin using white pigment, use medium-viscosity resin, layer your colors strategically, and manipulate the white pigment with heat to form delicate cells and wave crests.
Here’s a detailed step-by-step guide based on expert techniques:
🌊 Step-by-Step: Sea Foam with White Epoxy Pigment
1. Prepare Your Workspace
- Use a level surface and protect it with plastic or silicone mats.
- Wear gloves and ensure good ventilation.
2. Choose the Right Resin
- Opt for medium to thick viscosity epoxy (e.g., ArtResin or Honey Resin) to help control pigment flow and cell formation.
3. Mix Base Resin Colors
- Pour clear resin into separate cups.
- Add ocean-themed pigments (blues, teals, greens) to each cup.
- Mix thoroughly for 2–3 minutes, scraping sides and bottom.
4. Pour the Ocean Layers
- Pour colored resin in waves or bands across your surface.
- Use a spatula or gloved hand to blend edges for a natural gradient.
5. Prepare White Pigment for Sea Foam
- Mix a small amount of white pigment powder into a separate cup of resin—start with 1–2 grams of pigment per 30 ml of resin.
- Stir thoroughly to avoid clumps.
- Let the white resin sit for 15–20 minutes to thicken slightly before use.
6. Apply the White Foam Layer
- Drizzle or swipe the white resin along the crest of your wave zones.
- Use a silicone tool or gloved finger to feather it into the blue resin.
7. Create Cells with Heat
- Use a heat gun or torch to gently warm the white resin.
- Move in circular motions to encourage cell formation and lacing.
- Avoid overheating—this can cause yellowing or over-thinning.
8. Optional: Add Alcohol or Cell Activator
- Some artists use a drop of isopropyl alcohol (91%+) or a cell activator to enhance foam texture.
- Test on a sample first to avoid unwanted reactions.
9. Let It Cure
- Cover your piece to protect from dust.
- Allow to cure for 24–72 hours depending on resin brand.
🧪 Tips for Better Sea Foam
- Use less white pigment for softer foam; more for bold crests.
- Layer in stages if working on large surfaces.
- Practice on coasters or small boards before tackling large art pieces.

